When you fall asleep at 8pm... before your 2yr old... you know that it was an amazing holiday weekend spent with dear friends who at this point are basically family, especially when said toddler calls them uncle and auntie.
Unfortunately, it's 1am and I am now wide awake while hubby and toddler are sleeping peacefully. After traveling and spending time with people I love I always seem to get into a "slump," and right now I can't shake the thought that I should be doing so much more with my life - I just wish I knew what that was.
I am a Christian, daughter, grand daughter, sister, wife, daughter-in-law, "auntie," mother, friend, university graduate, yet I still feel that longing for "a place to belong." I have always wanted to work somewhere that allowed me to impact others lives positively, I just don't know how or in what capacity that is at the moment...

Showing posts with label Holiday. Show all posts
Showing posts with label Holiday. Show all posts
Thursday, December 29, 2016

Friday, March 25, 2016
Good Friday +Recipe ("Crack"er Toffee)
Last weekend we drove up to Fredericksburg, VA to meet with friends living in Maryland as well as friends from Portland that flew in to spend a week with the Maryland friends, followed by a week with us. It was so much fun getting together again - it had been 2yrs since we had all lived in the same place (Hawaii) and we have added 3 more kids to the group! Easter will be our first major holiday here in Virginia that we don't have travel plans or family coming to town for. It made me a bit sad thinking about our time in Hawaii because we were such a close knit group always making sure everyone was included in holiday potlucks, etc. considering we were all thousands of miles away from family in the middle of the Pacific Ocean...
Anyway, today is Good Friday and for us that means remembering the sacrifice of our Savior Jesus Christ. We may not be truly settled into a church or have that amazing group of Friends, but the knowledge of what Jesus did for us on that Cross is enough! Christ gave it all so we may have it all in heaven. It's Friday, but Sunday is coming!
I recently made some Cracker Toffee also known as "Dessert Crack" (bad name, I know!) since once you have a piece you won't want to stop eating it, it's SO addicting! This particular batch was Easter/spring themed, but I've made it for Christmas and I'm pretty sure you could make it for absolutely any occasion by changing the type of chocolate and toppings. If you're still looking for a dessert to bring to your Easter potluck, this is quick and simple!


---------------------------------------------
"Crack"er Toffee
2) Line a baking pan (mine is 17.25x11.5x1in) with foil and grease
3) Arrange saltines on pan
4) Place butter and brown sugar in a small sauce pan over medium heat
5) Once the butter melts completely, bring to a boil and stir constantly for 2min until nice and bubbly
6) Pour mixture onto the saltines, spread it quickly with a spoon/spatula
7) Place in oven for 8min
8) Remove from oven and immediately sprinkle the chocolate chips on top
9) Allow chips to sit for a minute then spread them evenly over the toffee layer
10) Sprinkle M&Ms
11) Sit on counter until cool (you can pop in the freezer for 10min but I don't recommend more unless you plan to store these in the fridge because the chocolate will sweat/melt)
12) Once completely cool and set, peel off foil and break into chunks
13) Will keep in an airtight container on the counter for 1wk (2wks in the fridge), but I doubt it will last that long!
---------------------------------------------

HAPPY EASTER!!!
-Tay
Anyway, today is Good Friday and for us that means remembering the sacrifice of our Savior Jesus Christ. We may not be truly settled into a church or have that amazing group of Friends, but the knowledge of what Jesus did for us on that Cross is enough! Christ gave it all so we may have it all in heaven. It's Friday, but Sunday is coming!
 |
| Photo credit: Verses Project |
I recently made some Cracker Toffee also known as "Dessert Crack" (bad name, I know!) since once you have a piece you won't want to stop eating it, it's SO addicting! This particular batch was Easter/spring themed, but I've made it for Christmas and I'm pretty sure you could make it for absolutely any occasion by changing the type of chocolate and toppings. If you're still looking for a dessert to bring to your Easter potluck, this is quick and simple!


---------------------------------------------
"Crack"er Toffee
- Approx 50 Saltine Crackers
- 1 cup butter (2 sticks)
- 1 cup packed brown sugar
- 2 cups dark chocolate chips (or any type of chocolate you prefer)
- M&Ms for topping (I've used slivered almonds as well)
2) Line a baking pan (mine is 17.25x11.5x1in) with foil and grease
3) Arrange saltines on pan
4) Place butter and brown sugar in a small sauce pan over medium heat
5) Once the butter melts completely, bring to a boil and stir constantly for 2min until nice and bubbly
6) Pour mixture onto the saltines, spread it quickly with a spoon/spatula
7) Place in oven for 8min
8) Remove from oven and immediately sprinkle the chocolate chips on top
9) Allow chips to sit for a minute then spread them evenly over the toffee layer
10) Sprinkle M&Ms
11) Sit on counter until cool (you can pop in the freezer for 10min but I don't recommend more unless you plan to store these in the fridge because the chocolate will sweat/melt)
12) Once completely cool and set, peel off foil and break into chunks
13) Will keep in an airtight container on the counter for 1wk (2wks in the fridge), but I doubt it will last that long!
---------------------------------------------

HAPPY EASTER!!!
-Tay
Saturday, February 13, 2016
No-Bake Peanut Butter Hearts


Reese's are like my favorite "candy bars," with PayDay's in a close second... But I also want cleaner ingredients so I found Detoxinista's recipe and used some IKEA silicone ice molds for a spin. You may have all the ingredients in your pantry right now (the only truly "unique" ingredient is coconut flour)! I just made these for my family and neighbors to celebrate Valentine's Day.

Peanut Butter Hearts (or balls/any other mold you have):
Gluten free, vegan
Filling
Filling
1/2 cup natural peanut butter, I used chunky because I don't mind the crunch
2 Tbsp pure maple syrup
1 Tbsp coconut flour
Coating
1/2 cup dark chocolate chips
1/2 tsp coconut oil


Combine peanut butter, maple syrup, and coconut flour together, you can roll into balls/shape hearts and place on waxed paper. Use a fork to dip the balls into chocolate (or just drizzle over the top - you may need more chocolate to completely cover them).

If you did use molds, place the peanut butter mixture on top of the chocolate.


I hope you enjoy!
-Tay
Tuesday, February 9, 2016
DIY Watercolor Prints
I'm going to come out and say it... Pinterest has made motherhood ridiculous.


Okay, now that that's off my shoulders I have an EASY toddler friendly craft for you. Just be smart and buy washable water colors and know that there will be paint on the baby, the floor, and possibly the wall next to the stairs (I still can't figure that one out, he's a magician I guess).
Here's what you need:
- Cardstock Paper (I actually used thick sketch paper)
- A white crayon
- Washable water color paints
- Thick paint brushes for little hands
Optional: newspaper in attempt to contain the mess!
Steps:
1) Draw your designs on the paper, make sure you have GOOD lighting, especially if you want to go over the same area a couple times to thicken up the design. I did this the night before after I put my son to bed.
2) Set-up your paint station.
3) Wet brush, and dip in paint.
4) Show toddler how to paint the paper.
5) Randomly trade out brushes with new colors.
6) Just go with the mess!
The beauty of these are that you can change the designs for any time of the year... Spring flowers, fall leaves, etc.
Don't have kids? That just means your watercolor art can be "perfect." Think color gradients, even and matching strokes, non-soaking wet paper, haha!
These Valentine's are on their way to family all over the country (hopefully they already arrived so we don't blow the surprise!), if you make some please share with me either in the comments below or on Instagram by tagging @thedaringdandelion.
Happy painting!
-Tay
Sunday, December 13, 2015
DIY Chocolate Peppermint Spoons.
In a pinch for a last minute gift? Try these chocolate spoons!
Ingredients:


Place your peppermints (or candy canes) in a ziplock baggie, gently (my first bag exploded all over my kitchen!) whack them with a wooden spoon.

Melt your chocolate either in the microwave or on the stove, watch closely as chocolate can burn! Dip the spoons and slowly rotate them to get a nice even coating.

While the chocolate is still melted, sprinkle with the crushed peppermint. Place on wax paper to dry. You can expedite the process by placing in the fridge or freezer, but I have much better luck just keeping them on the counter. Every time after I try using the fridge/freezer method they are moist to the touch and melt quickly once I take them out (not ideal for gift giving).

Seal as desired. I used traditional sandwich baggies, some scotch tape, and a bit of baker's twine.

Create your final gift by combining with hot cocoa packets in a festive mug (both can be found at the dollar store if you're on a tight budget!)
Do you have any awesome last-minute, but doesn't look "last-minute," gift ideas?
Please share them with me in the comments!
-Tay
Tuesday, December 1, 2015
Thrifty Trends - Holiday Decor.
Aubrey is back with some holiday decor inspiration!
I'm in the middle of deep cleaning my house one last time before the year is over, then I am going to pull out my Christmas decoration boxes and thin out the items I no longer use, like the look of, or I got super cheap from the dollar store for our first Christmas together. I think it's time to start investing in and creating things I want to keep for a long time!

If you complete a project inspired by her post let us know in the comments, if you use Instagram you can also hashtag #thedaringdandelion #freshlybrewedhome #thriftytrends and tag @thedaringdandelion
I'm in the middle of deep cleaning my house one last time before the year is over, then I am going to pull out my Christmas decoration boxes and thin out the items I no longer use, like the look of, or I got super cheap from the dollar store for our first Christmas together. I think it's time to start investing in and creating things I want to keep for a long time!
If you complete a project inspired by her post let us know in the comments, if you use Instagram you can also hashtag #thedaringdandelion #freshlybrewedhome #thriftytrends and tag @thedaringdandelion
After you check out this inspiration post, make sure to pop on over to Aubrey's website [A Freshly Brewed Home] for more tips, tricks, and ideas!
-Tay
------------------------------------------------------
So now that we are past the wonderful holiday of Thanksgiving, it's safe to say that we're completely in Christmas territory. Most of you have your trees up and you are wearing your cozy Christmas jammies every night. It's such a fun and beautiful time of the year and whether you are hosting parties or not, you want you home to feel cozy, welcoming and festive.
So
how do you achieve the look you want? Sure, you can go to Target and
buy all the things in the dollar spot, a few packages of ornaments, some
wreaths, lights and a whole bunch of knick knacks and your house can
look like their advertisements. But I really feel that the coziest homes
have a mix of a few thoughtfully selected items and homemade or found
decorations. The best homes look curated...as if all their contents have
been collected over time and they have meaning. It's always the details
that make the difference.
I
love natural garlands, pine cones, cranberries, white lights and wooden
accents. There's something special about the natural beauty of winter
that I love to bring indoors. I'm sure that as my little munchkin gets
older, she will want some Santa things and bright colors but I want to
maintain the reason for the season and keep things minimal and
meaningful, which I'm sure will include a lot of her homemade
ornaments.

Here
are a few tutorials that I have found around the web (because I'm
terrible at tutorials) and some thrifty tips to create a beautiful and
natural home for the holidays.
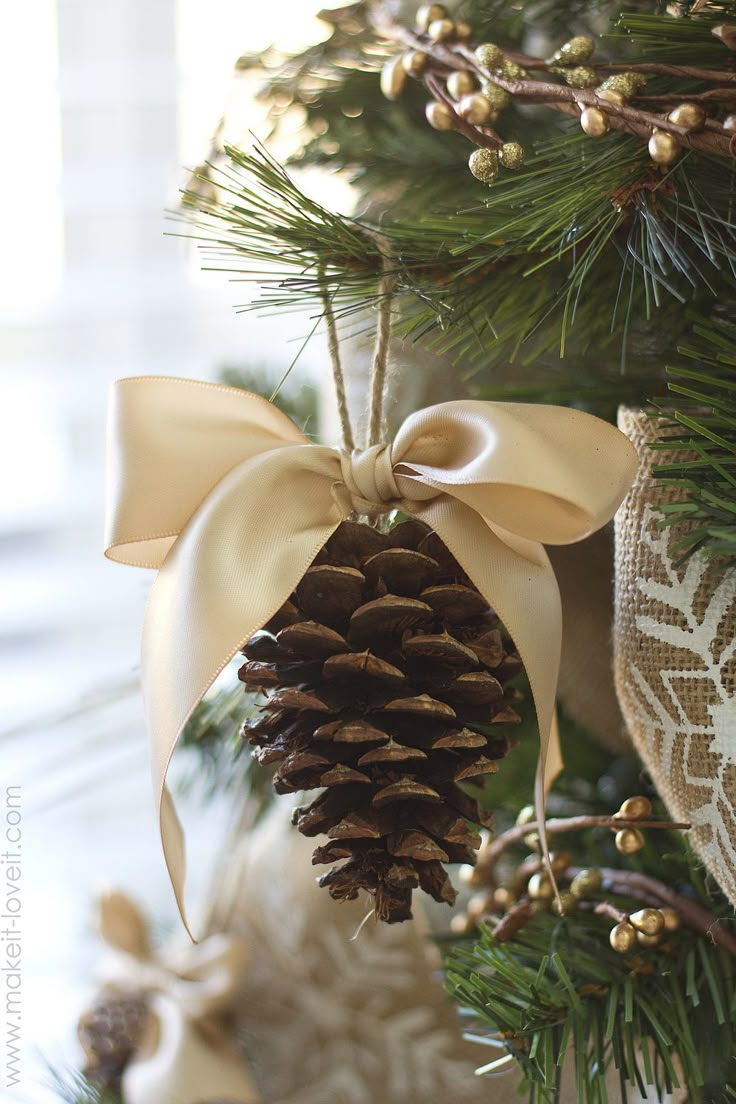
I
love the simplicity. If you have children, go on a nature scavenger
hunt to find pine cones. Then hot glue some twine for a hanger and add a
bow in any color ribbon you want!

This tutorial is great and paper snowflakes are so classic!!! And inexpensive ;)
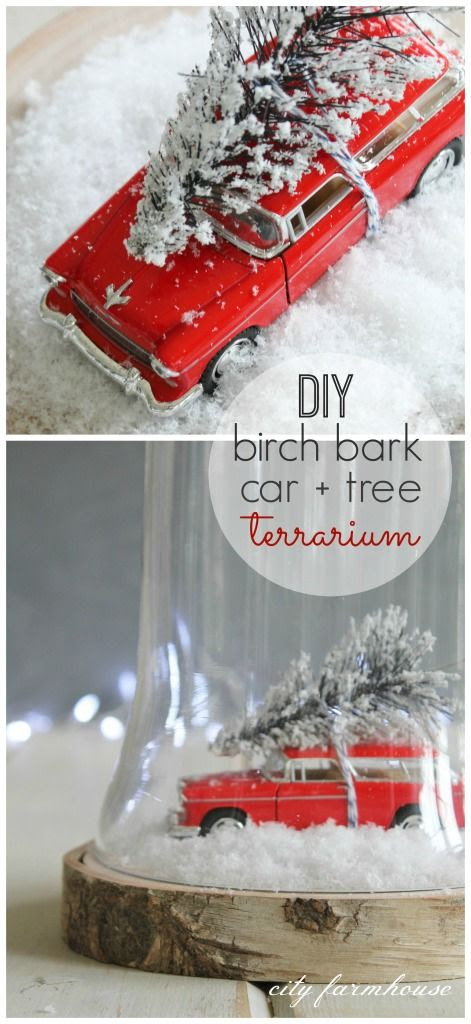
This tutorial is a little more in depth and might take some time but I just love love love this!!
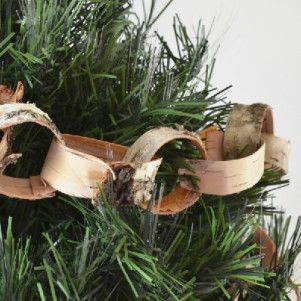
This one uses birch paper which is super cool but you can use whatever paper you want! Another cheap classic.

These
are so fun to make! I covered mason jars with epsom salt and put
candles in them for our wintry outdoor wedding and I loved them so much!
Take away Tips
- Keep it simple and use things around your house/outside to create natural decorations. Get creative! Buy a bag of cranberries (usually on sale after Thanksgiving) and string together a pretty garland.
- You don't have to spend a fortune on Christmas decor! Shop your dollar store for craft supplies and greenery. Take advantage of holiday sales to get your big ticket items like trees (or go cut your own real one!! Usually it's only $10-$20 a tree-or at least around Colorado it is) Costco has huge packs of lights for cheap and usually Walmart does too. Shop around and piece together your look.
- Shop the after Christmas sales for the next year!
- Have fun! The holidays can be such a stressful time but they don't need to be. Enjoy time with family and friends and don't worry about your home being "magazine/Instagram worthy." Keep it simple and meaningful to you and your family.
Happy Holidays,
Aubrey
Thursday, October 29, 2015
Cullipher Farm - Pumpkin Patch.
If you follow me on Instagram, I've been posting teaser photos from our trip out to the farm...
This past weekend we headed down to Pungo and hit up Cullipher Farm. We searched and searched for a pumpkin patch that didn't have an entrance fee, because honestly little man is way too young for all of the kids activities and we really didn't feel like spending an hour or so in a cornfield trying to find our way out of a maze. Our second desire was a patch that you actually PICKED them, aka: off the vine. Cullipher Farm fit the bill!
We arrived and instantly got a laugh at the parking situation, because well you know "there's something 'bout a truck, in a farmer's field..."

We headed to the main area for the "low-down," it was decorated with cute crates, mums, and an assortment of pumpkins and goards (I never knew there were SO many different kinds). They also had a small "market" under the tent offering ciders, fall flavored baked treats, butters, and jams.


We waited until after we got our pumpkins ($8 for all three! We got a traditional Jack, a blue Haikido, and a white Cotton Candy, so fun...) to shop at the market and came away with a 1/2 gallon of apple cider, a small jar of apple butter, as well as the most delicious pumpkin ice cream!
The farm is open through November 1st, so if you're still looking to go you have THREE days! Check out their website for full information.
-Tay
This past weekend we headed down to Pungo and hit up Cullipher Farm. We searched and searched for a pumpkin patch that didn't have an entrance fee, because honestly little man is way too young for all of the kids activities and we really didn't feel like spending an hour or so in a cornfield trying to find our way out of a maze. Our second desire was a patch that you actually PICKED them, aka: off the vine. Cullipher Farm fit the bill!
We arrived and instantly got a laugh at the parking situation, because well you know "there's something 'bout a truck, in a farmer's field..."
We headed to the main area for the "low-down," it was decorated with cute crates, mums, and an assortment of pumpkins and goards (I never knew there were SO many different kinds). They also had a small "market" under the tent offering ciders, fall flavored baked treats, butters, and jams.


We waited until after we got our pumpkins ($8 for all three! We got a traditional Jack, a blue Haikido, and a white Cotton Candy, so fun...) to shop at the market and came away with a 1/2 gallon of apple cider, a small jar of apple butter, as well as the most delicious pumpkin ice cream!
The farm is open through November 1st, so if you're still looking to go you have THREE days! Check out their website for full information.
-Tay
Subscribe to:
Posts (Atom)