Showing posts with label Design. Show all posts

Wednesday, February 17, 2016

Thrifty Trends - Sprucing Up Your Laundry Room


This post is so refreshing considering this is what I deal with on the daily...

We're renting and the laundry is located below the stairs, across from the half-bath (which I actually stood in for the photos since the hallway is only wide enough for the bathroom door to swing open!). Aubrey even caught me on laundry day- so real life photo post of my laundry mess! My favorite thing about my laundry room closet is the sign above that I've had since 2011, haha! Someday when we purchase a house, I'll know exactly what I want after living in a new place every 2-4yrs!

If you complete a project inspired by her post let us know in the comments, if you use Instagram you can also hashtag #thedaringdandelion #freshlybrewedhome #thriftytrends and tag @thedaringdandelion @aubreylouiseb

After you check out this inspiration post, make sure to pop on over to Aubrey's website [A Freshly Brewed Home] for more tips, tricks, and ideas! 
-Tay
 ------------------------------------------------------

Let's be honest, doing laundry is hardly anyone's favorite thing to do... but everyone has to do it so we might as well make it a pretty space! If you're like me, you hate spending a lot of money on decor especially for something that is to fit a specific space when you know you'll be moving in the future. But that doesn't mean you don't have to do anything to a room...small details likes rugs and wall art make a huge difference! Invest in pieces that you know can work in other spaces so that you can play Tetris with all your decor when you move.

Now I know not everyone has a laundry room with a sink or cabinets or room for large bins (heck, mine is literally a closet with bi-fold doors and a stack of builder grade shelves) but you can still make your room (or closet) a space that functions well. Here are a few thrifty tips on how to get a functional and beautiful laundry room.
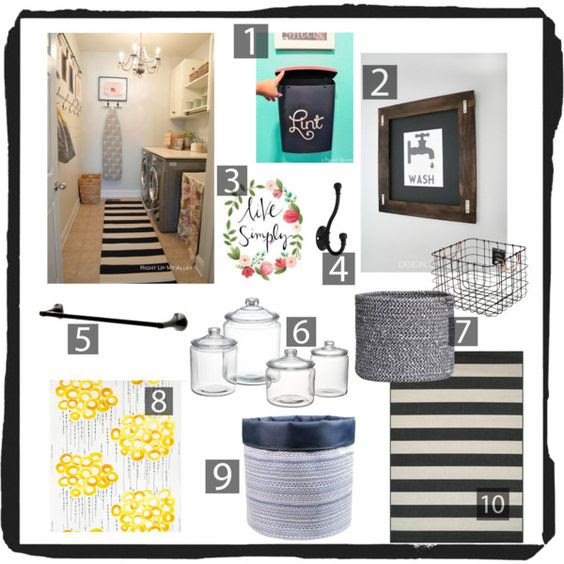
A home decor collage from February 2016 by aubreyd92 featuring interior, interiors, interior design, home, home decor, interior decorating, Couristan, Threshold...:
  1. Find a mailbox like this one here for $12.95 to put lint and small trash in (or just use a small basket)
  2. Free printable from Pinterest put into a frame
  3. Another free printable from Pinterest
  4. Get two hooks from Lowes at $3.97 each, mount them on a scrap piece of wood to create a cool ironing board holder that hangs on the wall
  5. Install a towel bar (cheaper than a curtain rod) like this one underneath a cabinet or just on the wall for a place to hang clothes
  6. You can get glass jars like this at Walmart for $5.89 or you can find similar ones to mix and match at thrift stores (usually for just a buck or so). When you store things like laundry detergent, clothespins or oxi clean in them, it automatically makes them look fancier!
  7. Use storage baskets like this for $12.99 at H&M and this for $15 at Target for storing towels, missing socks or just keeping your dryer sheets and Tide to-go sticks out of sight
  8. Cover a sink front with a homemade fabric curtain to hide buckets and other utility items. I liked this particular fabric which is $8.99 for a 5'x5' piece at IKEA. Or visit your local craft store and raid the clearance bin for cute fabric. Buy some iron-on hemming tape (typically a buck or two) for a no-sew hack.
  9. Use a storage bin or two to sort laundry
  10. Don't forget to add a rug like this one from Wayfair for $45. A sturdy indoor/outdoor one would probably be best in a utility space but if standing on a fluffy rug would make doing laundry feel fancier, then get one!
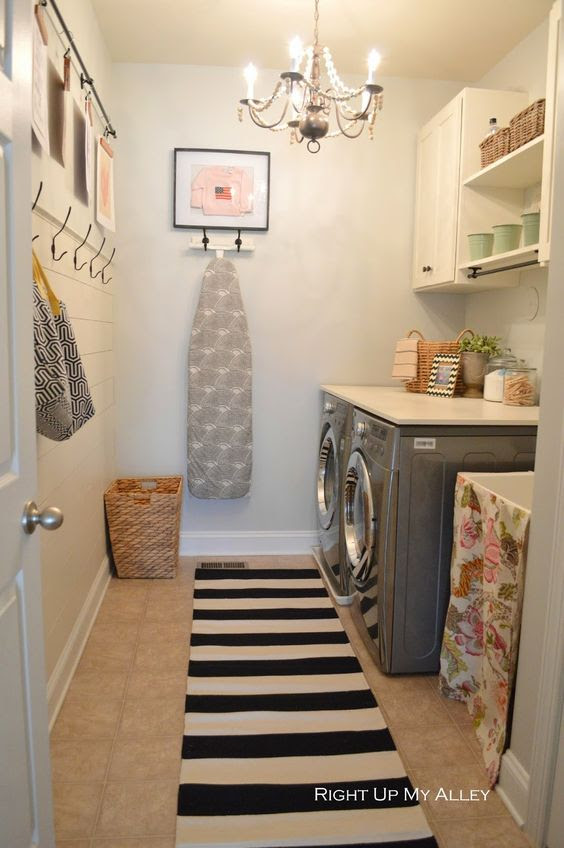
Here is the inspiration photo that I used. Tracy at Right Up My Alley used some DIY hacks and simple little changes to update her laundry room and made it a bright and cheery little space. I love that she framed a little sweatshirt that all of her girls wore when they were babies...so sweet!!! And such a great idea to make personal art!

I also love how she chose to store her ironing board...brilliant! And her chandelier is great. Most people I know that rent, can't change their lighting...but if you can, please do! It makes such a difference. Find an old chandelier at your ReStore and spray paint it. Tracy added beads to hers and I love that detail.
Laundry Room Reveal:
Source

I know everyone has different taste and styles so here are a few more inspiration photos of beautiful and functional laundry rooms. They don't need to be anything fancy, I promise!

Chris Loves Julia Home Design blog. kinda like the pipes! Also really like the hampers and folding self. I could do this!:
Source

Builder-grade Laundry rooms get a Farmhouse Modern Makeover, oozing with charm! To see the reveal, visit DIY beautify:
Source

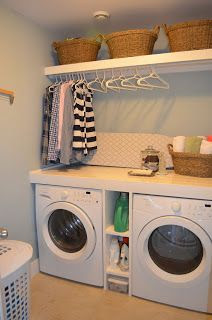
Fun Home Things: 10 Laundry Room Ideas. The counter atop the washer/dryer and shelf above with room for hangers is all SO great!:
Source

There are a few things these spaces have in common...rugs, shelving, a space to fold clothes and a rack to hang items after they're washed. Add in some meaningful or funny artwork, some storage baskets and containers and your laundry room can turn from boring to beautiful! You don't have to spend a fortune to make your space more fun...go "shopping" in your own home and go explore your local thrift stores. Find some fun pieces and you'd be surprised how much of a difference a rug, some artwork and glass containers can make!

Happy Decorating,
~Aubrey
You can find me here:
(where I post inspiration photos daily)
and

Wednesday, February 3, 2016

Guest Post: "Reigning in the Toy Clutter"

While washing dishes the other night, I smiled when I saw my Aloha surfboard behind the sink, and thought about my friend Taylor - who hosted the class I created said surfboard in. There are multiple people I can say that I've lived in 2 states with thanks to the military, but she is the winner so far with THREE! We met in my senior year of college (2008-2009) at Arizona State University. Her husband (fiancé at the time) decided to join the Navy and I married my Marine that fall. Eventually allowing us to live near each other both in Maryland and Hawaii. Crazy, right? She and I have very similar views on clutter and what gets to stay in our homes. Maybe in the future I'll do a post on how I organized little man's toys and books, but for today - I'm excited for you to read all about Taylor's toy storage solutions for her adorable little girl!


How do you handle the toy clutter?
Share your solutions with us in the comments!
-Tay

------------------------------------------------

My job as a regional rep for CeCe Caldwell’s Paints takes me around the Northwest and I’m often at my room in Lighthouse Antique Mall but I do most of my marketing work, order fulfillment and DearOlympia.com shipping from home.  My new Enchanted Northwest Soy Candle Line line demands more storage space and space is at a premium.  I refuse to take out a storage locker or cram my garage with unused stuff.  


Quick tangent: after we moved out of our military base housing in Hawaii (read: they decided to go ahead and demolish our house 3 months ahead of schedule), I promised myself that business stuff would no longer take over our living spaces.
 
In Hawaii, we literally had cases of paint lining our bedroom walls.  It’s mentally stressful to me to try to work in an abundance of clutter.  Cramming stuff in and out of shelves makes me irritable because when I have time to work alone, I want to max out that time on work and not on fighting pans and containers and shoving my daughter’s toys in every nook and cranny!

We recently purchased a foreclosure in WA and renovated it.  I didn’t want a huge house, just a livable one.  My philosophy is that you let the house size dictate your stuff, you don’t let your stuff dictate your house size.  
When we finally started to move stuff back into the house, I was like the “none shall pass” character from Monty Python.  Unless I needed to use it in the next two weeks, it didn’t come in!  We donated it or took it to the dump.  That was working well but as all parents know, Christmas can throw you. 

Adair was blessed to receive many gifts but the gifts had nowhere to go.  I decided to use an industrial shelf I already had for her toys downstairs.  I further decided that she would get rid of any toys that we couldn’t nicely fit on that shelving unit or in the tubs beside them.  She does have some shelves in her room for books and her tricycle and slide live outside.

I purchased some fabric and metal storage containers (under $75) from Target and got to work.  Craft supplies went in one container, legos in another, little figurines in another, etc.  When I was done she had some infant type toys that were large and bulky (you know the kind) that didn’t fit on the shelves.  We donated them to Salvation Army and now another child can enjoy them.  

One toy in, another toy out.  That is my policy.  I have had zero regrets so far. Adair is allowed to play with one container at a time which is good because her attention span is so short anyway.  Then we put it back in the container and put it back on the shelf.  I am hoping this puts her on a path of enjoying her stuff but not letting her stuff dictate her happiness or emotional state.

This is a key to my semi-sanity in working from home. The less to put away, the quicker I can put things back in cabinets, wipe down the counter and vacuum the floor. The fewer items we have, the easier it is for my husband and I to tag-team picking up the house because we both know where everything is and where everything goes.

My house is never as clean as I want it and I’m 100% okay with that.  It’s pretty much clutter free, though, not because of my organization skills but my ability to let go of items instead of constantly fretting over where and how to store things.  


~Taylor
DearOlympia.com
Facebook
Instagram


Monday, February 1, 2016

Thrifty Trends: 2016 Top New Trends

Say what... my gold and crystal lighted ceiling fans are back in style? Haha... okay maybe that's a stretch, but we live in a rental that we've already installed laminate floors in, I'm not about to replace light fixtures. But hooray for our circa 2009 IKEA furniture being on-point this year! ;) 


If you complete a project inspired by her post let us know in the comments, if you use Instagram you can also hashtag #thedaringdandelion #freshlybrewedhome #thriftytrends and tag @thedaringdandelion @aubreylouiseb

After you check out this inspiration post, make sure to pop on over to Aubrey's website [A Freshly Brewed Home] for more tips, tricks, and ideas! 
-Tay
 ------------------------------------------------------


Are you wanting to revamp your home decor a little but have little to no money to spend on extra items?

Well I'm going to try help you by looking at some of the top new trends of 2016 and showing you how to achieve the look inexpensively.
  1. Dramatic Color
  2. Gold and Copper Accents
  3. Scandinavian Design (simple, neutral)
  4. Geometric Cement Tiles
There are a lot of new trends that I'm seeing on Pinterest, Houzz, and other design magazine but I'm just going to focus on a few that I see most often.


1. Dramatic color 
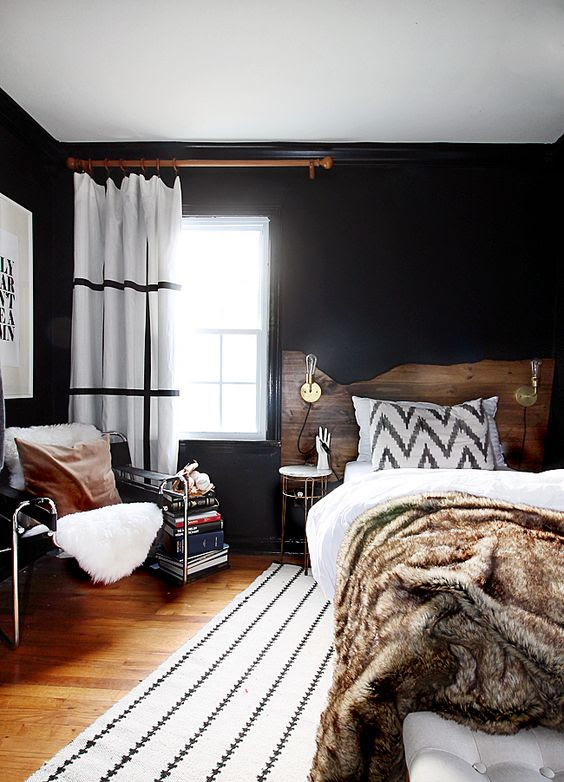
Moody and dark bedroom masculine. For a similar faux fur throw try: http://www.naturalbedcompany.co.uk/shop/accessories/natural-look-faux-fur-throws/:
Source

Dramatic color is a favorite trend of mine because my aesthetic tends to be full of dark, bold colors mixed with neutrals. Black is growing in popularity now in kitchen cabinets, furniture and even accent walls! Grey is easily becoming the new "builder grade" neutral and I'm seeing a lot of beautiful jeweled tones in the form of furniture pieces. Just because it's dramatic doesn't mean it needs to be dark if that's not your favorite look. Any use of color is great!! Pantone's Colors of the year are Rose Quartz and Serenity (a soft blue) and those are dramatic in a totally different way.

The easiest (and cheapest) way to use color is in the form of paint...whether it's a wall or painted furniture. You can also incorporate it in accent pillows, blankets, rugs and other small decor pieces.

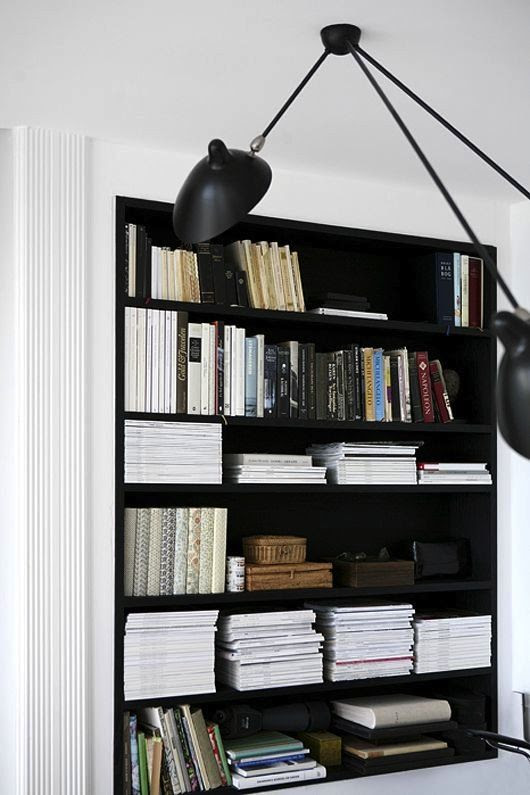
Paint the inside of your bookshelf a dark or bold color (this is a great idea if you can't paint your walls but still want color in your life).
All of us have stacks upon stacks of magazines. I love the way this bookcase was styled with them.:
Source

Or paint a furniture piece that you've had in your space for a long time. It's crazy how different a coat of paint will make the room look.

My Photo


2. Gold and Copper Accents
White and gray kitchen features a gray freestanding island topped with white marble illuminated by ...:
Source

The fact that Gold and Copper Accents are coming back is shocking to a lot of people. Most have just changed out their 80's gold fixtures in hopes of updating their house and now they turn around to see a lot of people wanting  them again. I think this accent needs to be done carefully because who knows how long it will last this time. While it can be done beautifully with a certain look, don't go investing too much money in it quite yet. But if you love the look, don't hesitate to jump on board. If you happen to live in an apartment that still has gold, you're in luck ;) Spruce it up with a contrasting dark color on the wall or some natural wood tones.

You can incorporate it with lamps, vases and wall art.
You can also switch out your cabinet knobs/pulls fairly inexpensively which is a great tip even for renters since you can just put the originals back before you move.
(Tip: Go for a more muted gold rather than the super shiny traditional look and geometric shapes and your space will look a lot more eclectic and updated).

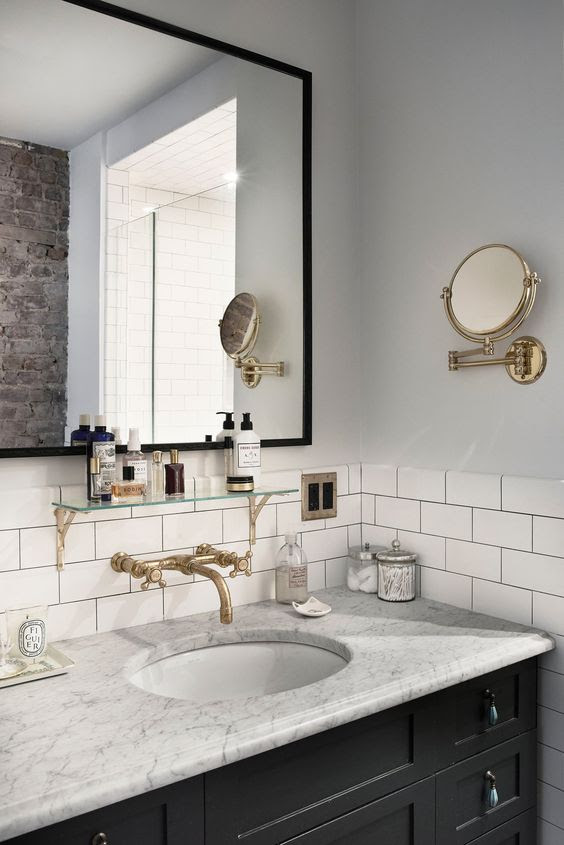
This bathroom looks like a simple bathroom with just some basic upgrades...a black frame around the mirror, a dark painted cabinet and a cool gray on the walls. It takes the gold fixtures to another level, making them look glamorous, not basic.
Simple beautiful Brooklyn bathroom inspiration with subway tile and gold hardware accents:
Source

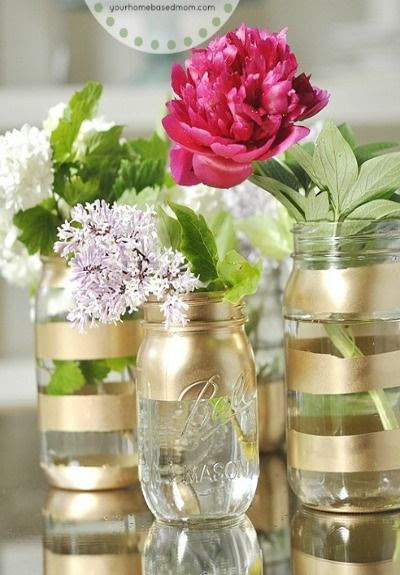
Make your own gold accents with a little painters tape, gold spray paint and mason jars (or any other jars you have in your recycling bin)
Add a classy splash of metallic color to your home with quick and easy striped mason jars.:
Source

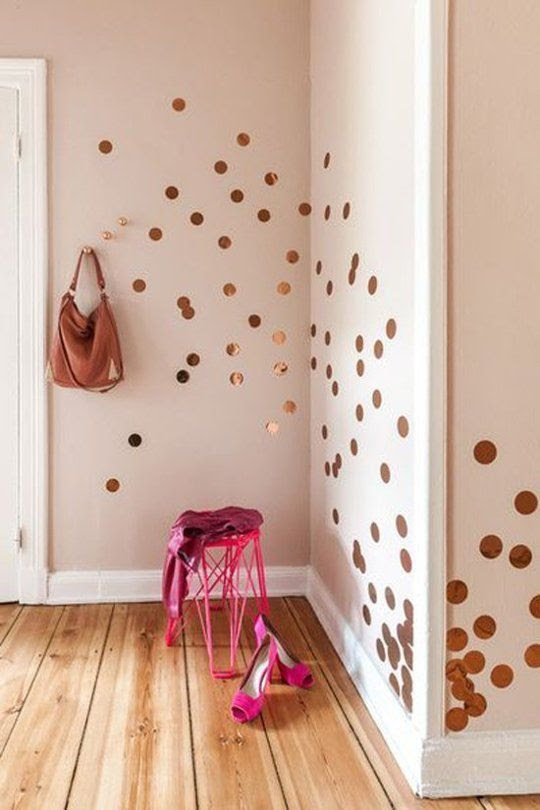
Or break out the washi tape/decals and create some cool wall accents

Real Room Inspiration: Decals, Removable Wallpaper, Washi Tape & Contact Paper — Apartment Therapy's Home Remedies:
Source

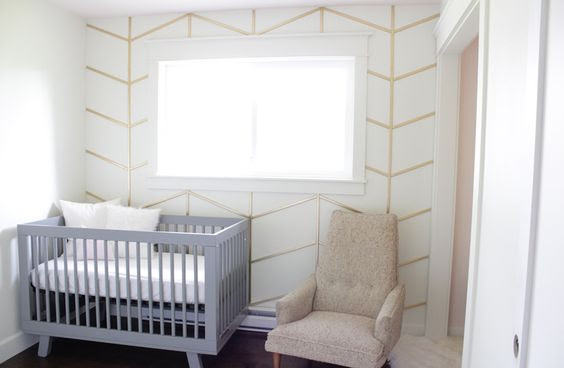
Loving this Golden Herringbone Wall from The Caldwell Project!:
Source

Or create drama by gold brackets for your shelves and then make a washi tape wall using black and white
Great tips for de-cluttering your home in the new year!:
Source


3. Scandinavian Design 
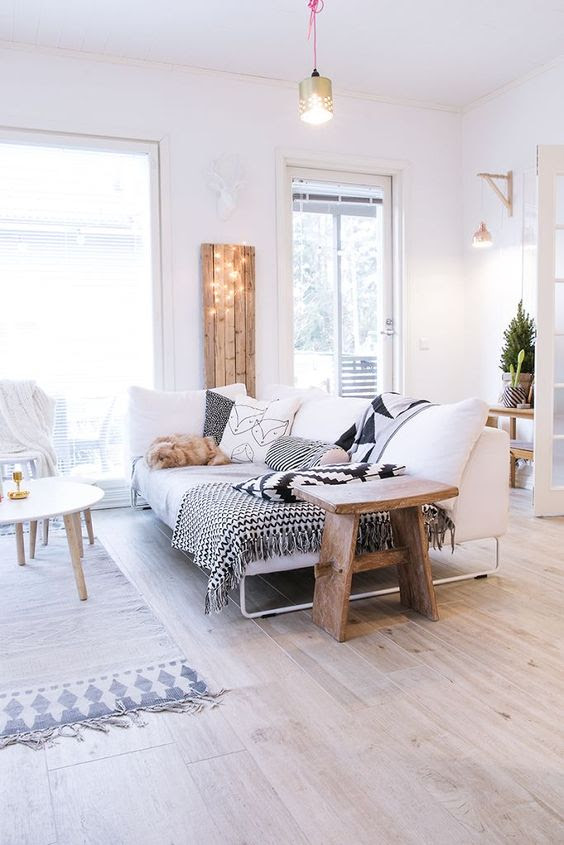
Homedit - interior design and architecture inspiration:
Source
Scandinavian design has been popular for awhile but blogs seem to think that this is a big year for it. I love the simple, clean lines and often neutral tones of it. If you don't know what it looks like, just think of Ikea and that's the aesthetic. Wood tones, neutral colors, clean lines, mix of textures and a non-cluttered look are key ingredients to a Scandinavian room. Good thing for us, Ikea is fairly inexpensive when it comes to most things so if you are looking to update your look to a more Scandinavian one, it's a great place to start.

Bedding is a great place to start for a cleaner, more Scandinavian look. Try for creams, grays and blacks with simple lines or patterns. Some simple bedding can make a traditional room look clean and fresh.

Source

You can also add some black and white art to your space. Typography and very graphic prints create a clean and simple look.

Source

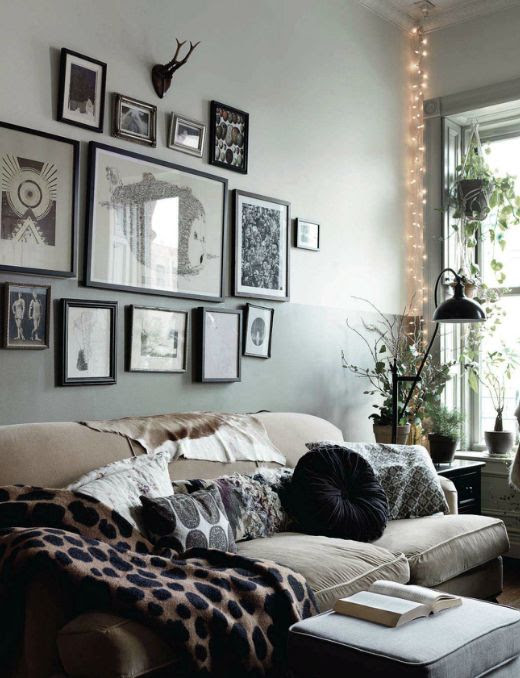
Another easy way to add Scandinavian style to your home is to layer textures. Furs, woven and soft textiles look clean on a neutral sofa.
BLISS - a lovely harlem brownstone:
Source


4. Geometric Concrete Tiles 
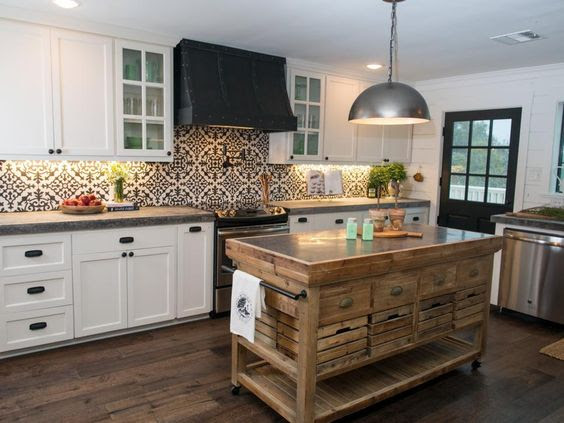
The recipe for this visually balanced kitchen includes plenty of natural wood to help soften the bold visual impact of the black-and-white patterned tile and the contrasting cabinets and countertops.:
Source
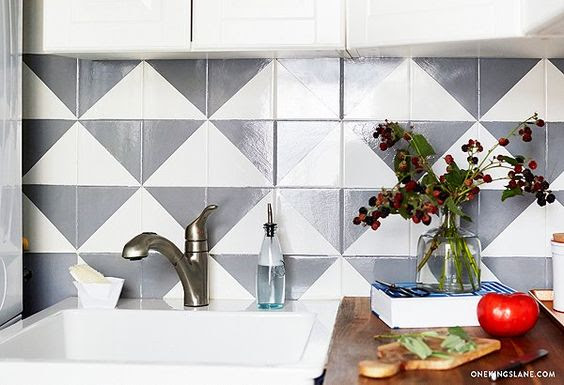
Geometric concrete tiles are things you see in HGTV shows that look super custom, are handcrafted and expensive. And while that usually is true, you can create something similar on a budget. If you have just basic tile, you can add washi tape to create your own designs. It will pull right up when you want to change it up or you need to move.

Our special projects editor, Megan Pflug, shows us how to give new life to a tile...:
Source

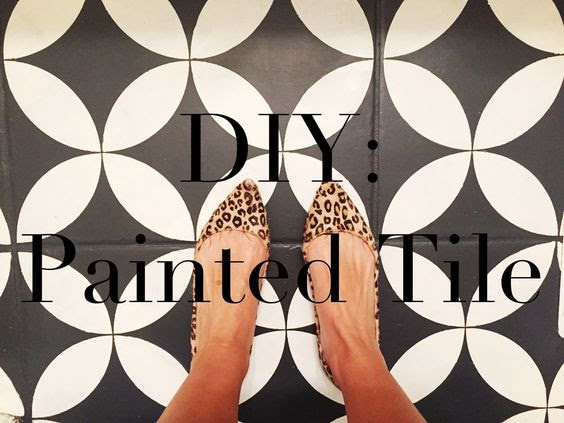
You also could get a little crafty and find some inexpensive cement pavers or tiles at the hardware store, a stencil and paint and have some fun creating your own geometric tiles

Remington Avenue: The Girl Who Painted Her Tile... What?:
Source


Trends are just that...trends.
They come and go often.
Don't feel like you have to follow every single one and don't feel terrible if your favorite aesthetic isn't "in" right now. Be true to you and it's fun to be different!

If you are wanting to change your space and maybe tackle a few of this year's trends, you do not have to spend a lot of money. Be creative with the things you already own and just input a few small changes to start. No need to commit everything to a particular style. The coziest of homes are an eclectic mix of pieces that tell a story of who the people are. And you'd be surprised how much a simple coat of paint, new cabinet hardware or a patterned pillow will make a big difference in your home.


Happy Decorating,
~Aubrey


You can find me here:
My Website
(where I post inspiration photos daily)
and
Instagram

Tuesday, December 1, 2015

Thrifty Trends - Holiday Decor.


Aubrey is back with some holiday decor inspiration!

I'm in the middle of deep cleaning my house one last time before the year is over, then I am going to pull out my Christmas decoration  boxes and thin out the items I no longer use, like the look of, or I got super cheap from the dollar store for our first Christmas together. I think it's time to start investing in and creating things I want to keep for a long time!


If you complete a project inspired by her post let us know in the comments, if you use Instagram you can also hashtag #thedaringdandelion #freshlybrewedhome #thriftytrends and tag @thedaringdandelion

After you check out this inspiration post, make sure to pop on over to Aubrey's website [A Freshly Brewed Home] for more tips, tricks, and ideas! 
-Tay
 ------------------------------------------------------

So now that we are past the wonderful holiday of Thanksgiving, it's safe to say that we're completely in Christmas territory. Most of you have your trees up and you are wearing your cozy Christmas jammies every night. It's such a fun and beautiful time of the year and whether you are hosting parties or not, you want you home to feel cozy, welcoming and festive. 

So how do you achieve the look you want? Sure, you can go to Target and buy all the things in the dollar spot, a few packages of ornaments, some wreaths, lights and a whole bunch of knick knacks and your house can look like their advertisements. But I really feel that the coziest homes have a mix of a few thoughtfully selected items and homemade or found decorations. The best homes look curated...as if all their contents have been collected over time and they have meaning. It's always the details that make the difference.

I love natural garlands, pine cones, cranberries, white lights and wooden accents. There's something special about the natural beauty of winter that I love to bring indoors. I'm sure that as my little munchkin gets older, she will want some Santa things and bright colors but I want to maintain the reason for the season and keep things minimal and meaningful, which I'm sure will include a lot of her homemade ornaments. 

Here are a few tutorials that I have found around the web (because I'm terrible at tutorials) and some thrifty tips to create a beautiful and natural home for the holidays.
I love the simplicity. If you have children, go on a nature scavenger hunt to find pine cones. Then hot glue some twine for a hanger and add a bow in any color ribbon you want!

This tutorial is great and paper snowflakes are so classic!!! And inexpensive ;)


This tutorial is a little more in depth and might take some time but I just love love love this!!


This one uses birch paper which is super cool but you can use whatever paper you want! Another cheap classic.


These are so fun to make! I covered mason jars with epsom salt and put candles in them for our wintry outdoor wedding and I loved them so much!

Take away Tips
  • Keep it simple and use things around your house/outside to create natural decorations. Get creative! Buy a bag of cranberries (usually on sale after Thanksgiving) and string together a pretty garland.
  • You don't have to spend a fortune on Christmas decor! Shop your dollar store for craft supplies and greenery. Take advantage of holiday sales to get your big ticket items like trees (or go cut your own real one!! Usually it's only $10-$20 a tree-or at least around Colorado it is) Costco has huge packs of lights for cheap and usually Walmart does too. Shop around and piece together your look.
  • Shop the after Christmas sales for the next year! 
  • Have fun! The holidays can be such a stressful time but they don't need to be. Enjoy time with family and friends and don't worry about your home being "magazine/Instagram worthy." Keep it simple and meaningful to you and your family.
Happy Holidays,
Aubrey

Sunday, November 1, 2015

Introducing "Thrifty Trends."

I am so excited to introduce this segment, which will be featured on the 1st of every month. Aubrey is another amazing friend I met in Hawaii who just so happens to be an interior designer! I had asked her a while back if she would be interested in guest posting for me and am so happy she said "yes!" 


Each Thrifty Trends post will show you how to achieve the desired look for less. If you're anything like me, I love getting my money's worth, but I am also stingy with what I spend it on.

I don't drink coffee (I know *gasp!*) but I do love tea... here is a current photo of my "tea bar" (*ahem* tea tray) which unfortunately has to sit on top of the microwave in my extremely-limited-counter-and-storage-space of a kitchen. After reading this post I think it's in need of a make-over!

If you complete a project inspired by her post let us know in the comments, if you use Instagram you can also hashtag #thedaringdandelion #freshlybrewedhome #thriftytrends and tag @thedaringdandelion

After you check out this inspiration post, make sure to pop on over to Aubrey's website [A Freshly Brewed Home] for more tips, tricks, and ideas! 
-Tay
 ------------------------------------------------------

Coffee Bars are pretty trendy right now and I see them everywhere! Whether you sleepily fill your mug with keurig coffee, use a french press or you have your own espresso machine, an at home coffee bar is a great accent to your home. The key to creating your own is to accent the pieces you use often with beautiful accessories and consolidate everything onto a shelf, cart or other piece of furniture. Find an area in your kitchen or dining room that is convenient and has an outlet close by. Use whatever fits in your space and piece it together as you find things that speak to you. 

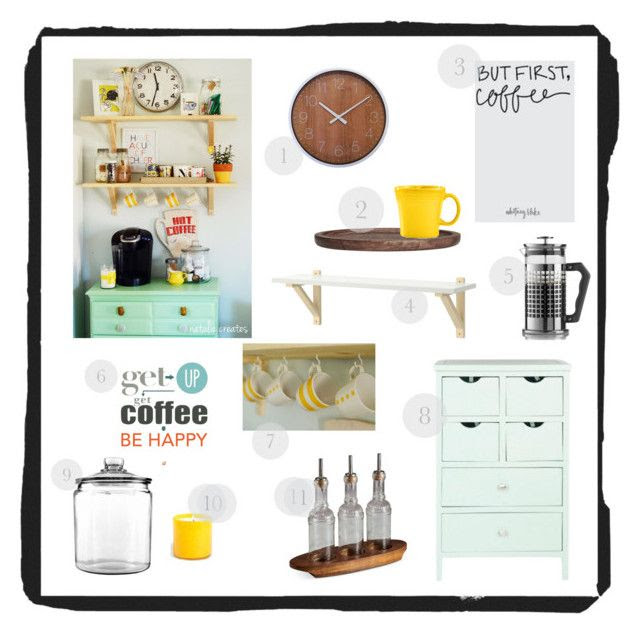
If you're like me, you're on a pretty tight budget. However, that doesn't mean that you can't have a beautiful home. This coffee bar I saw as a great inspiration is actually a DIY project that Natalie at Natalie Creates designed herself. She used a really ugly white dresser and painted it this awesome mint color and added some fun knobs to create her coffee bar.
Case in point...use what you can find at Restore, Goodwill or garage sales and use some creativity (and Pinterest tutorials of course) to make it what you want! I pieced together some inexpensive accessories to give you some inspiration that can take a project to a fabulous spot in your home.
DIY Coffee Bar by aubreyd92 on Polyvore featuring interior, interiors, interior design, home, home decor, interior decorating, Safavieh, Picnic Time, Anchor Hocking and Bialetti: DIY Coffee Bar by aubreyd92 on Polyvore featuring interior, interiors, interior design, home, home decor, interior decorating, Safavieh, Picnic Time, Anchor Hocking and Bialetti
1. This clock is $8.99 at Target

2. This tray is $11 at H&M (but I see similar trays for a buck or two at Goodwill all the time)

3. Find free printables on Pinterest for your artwork! (I do this all the time)

4. This shelf is $12.99 from IKEA. If you don't have access to IKEA (sad day) Walmart has cheap ones as well

5. This French Press is expensive (even on sale) but I see these everywhere-Starbucks, TJ Maxx, etc

6. Just another free printable! (Seriously, there's soooo many cuute ones out there!)

7. You can find hooks anywhere (these are $5 for 15 at Lowes) but make sure you find ones that will fit your mug handles

8. This chest is pricey but it's a good option if you don't want to DIY (but seriously, just find an old bookshelf, dresser, desk...anything that is table/counter height and it will work!)

9. This jar is $5.99 at Target and is perfect for storing k-cups or blends (use whatever works for you or what you have around the house...repurpose those spaghetti sauce jars, mason jars and other glass things!)

10. Find some candles, flower pots, bowls, etc to accent the aesthetic in the rest of your house. 

11. These are so great for storing syrups if you make your own. Just a set from Walmart will do (or make your own using empty wine bottles and oil spouts from Amazon). 

Take away Tips:
  • Don't clutter the space...just display your favorite mugs and hide the rest in the drawers or bins
  • Let it reflect your style...don't use bright pops of color if you love neutrals and don't use vintage accessories if you love modern things 
  • There is no right or wrong way to set up your coffee bar. You can make it as big or as small as you want with whatever pieces you like
  • Remember the purpose of a coffee bar...I know that as a mama and lover of coffee, I need a place that's easy for me to grab everything I need for a pick me up (or really a wake me up..ha!)

Here is my little coffee bar-nothing fancy at all but it has a couple of my favorite things.
And here's some more inspiration I'll leave here for you all!
~Aubrey

Creating Home Coffee Bar

Black and White Coffee Bar


Source-and a cool tutorial of how they changed the space